
Tuesday, January 10, 2012
Wednesday, November 3, 2010
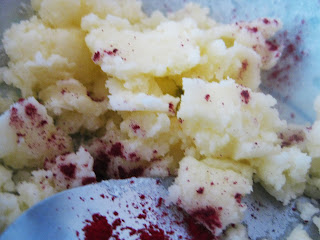
Cookie Mix

It's been a while since my last entry, completely swamped with group work, assessments, EXAMS (sigh). And it's not over yet. This is just a quick entry for anyone (though I doubt there are many) who follows my blog :)
A friend was in town recently, and I decided to give her a small gift. Cookie mix -in a jar. You can find the recipe on the links on the right hand side of this page if you are interested.
Gosh all I have to say is pack those ingredients in TIGHT. All the sugar fell through the gaps between the choc chips & I had to start over =( Here are the layers from top to bottom
-crushed nuts
-white choc chips
-milk choc chips
-sugar
-flour
I left the choc chips and nuts last because they're optional and it's up to the discretion of the receiver as to whether they'd like to use them, or how much they'd like to use. I even made a label for the lid haha

And the cookies once they are baked...

This is a super cheap, quick and easy gift. Can't wait til xmas time, definitely making more! Though I have a feeling a few of my friends will just nibble the contents of the jar from the top. haha
I wonder how long the ingredients keep though? Oh and of course, this idea is completely credited to bakerella!
x
Wednesday, September 8, 2010
Masterchef 'pressure test' Recipe - Black Forest Cake

It might not look perfect... but it sure was yummy!

*We used canned cherries & Kirsch instead of Brandy

Preheat oven to 160°C fan forced. Grease and line 2 x 20cm springform cake pans.
2. Add eggs and sugar to a heatproof bowl of an electric mixer, and set over a saucepan of simmering water over very low heat.
Whisk the mixture until 37°C. **However, lacking a thermometer -we didn't do this.
Remove the bowl from the heat and beat with an electric mixer on a medium-low speed for 5-8 minutes or until the mixture has cooled and thickened to a mousse-like consistency.
Sift the flour, cocoa powder and baking powder together twice. **We took this as pre sifting the flour, cocoa powder & baking powder into a bowl, and then sifting it again into the beaten eggs & sugar.
Using a large metal spoon, fold the dry mixture into the egg mixture in 3 batches until combined, adding the vanilla extract with the first dry batch.
3. Pour the mixture into the lined cake pans and smooth surface. Bake for 20-25 minutes or until sponge springs back when lightly touched. **We missed that line. Notice the fork holes. Haha, but it did spring back ;)
Allow to cool for 10 minutes in the pans, then turn out onto wire racks. Place in the blast chiller for 10-15 minutes until cake has cooled completely. We used the freezer.
4. The candied cherries.
Preheat oven to 120°C. Place cherries on a lined baking tray. Lightly dust with the sugar and place in the oven for 50-60 minutes. Remove and cool. Coat with remaining sugar. Set aside.
5. The cherry compote.

Add the sugar to a non-stick saucepan and place over medium heat. Once the sugar begins to dissolve add the cherries and cook until they start to release their juices.
Add the brandy and cook for 10-15 minutes or until the liquid has reduced and thickened. Strain, reserving liquor.
6. For the cherry syrup, heat 170ml water and the sugar in a small saucepan and bring to the boil, stirring constantly.
Remove from the heat and stir in the reserved cherry juice and compote liquor (**From step 6). Allow to cool.
7. Chocolate hazelnut praline mousse

To skin the hazelnuts
Roast the hazelnuts in the oven for about 10 minutes. Rubbing the nuts between your fingers the skin should come off.
**We lost our patience after a while and gave up on the skinning process. I believe that it didn't affect the taste of the praline mousse -so don't worry if you don't properly skin them either.
NEXT: In a dry heavy-based saucepan, cook sugar over medium heat, stirring, until melted. Once melted, cook without stirring, swirling pan, until lightly golden.
Add hazelnuts, stirring until well coated. Immediately pour mixture onto the baking sheet and cool completely, in blast chiller for 5 minutes.

Break praline into pieces. Place into a food processor and pulse until finely chopped. Set aside. **The blades in our little food processor simply was not moving so we had to do this step by hand. Chopping these nuts were quite tedious :(
It's okay though, it just added some "crunch", which I thought was a good thing.
8. NEXT:
(a)Melt the chocolate in a heatproof bowl set over a pan of simmering water.

(b) In another heatproof bowl, whisk the egg yolks.
(c) In another small saucepan, heat 250ml of the cream on low heat.
**You should have 3 things going on on your stove
Stir through half of the hot cream into the egg yolks. **Half of step (c) into what you made in step (b).

With the yolk & cream mixture you've just combined, pour into a small pot/saucepan and bring to the stove, on low heat. Stir until thickened -make sure the egg doesn't cook! Keep stirring :)
Stir the melted chocolate into the hot custard. Add the vanilla and allow to cool.
Next, whisk the remaining cream until stiff peaks form.
Fold into the chocolate mixture with the praline, until just combined. Set aside.
9. The mascarpone cream. Beat the mascarpone, vanilla and sugar in a bowl until smooth and slightly thicker in volume.
10. The chocolate ganache. Melt the chocolate in a heatproof bowl set over a pan of simmering water. Set aside.

Bring the cream to just below boiling point in a small saucepan. Remove from the heat, then add the melted chocolate and stir until smooth. Allow to cool until thick but still pouring consistency.
11. To assemble the cake, slice both cakes into thirds. Place the base of 1 cake onto a serving plate and brush with some of the cherry syrup. Spread over half of the chocolate praline mousse.
**We could only cut ours halves. But no matter! :)
12. Place the next layer of cake onto a board, and brush with cherry syrup. Spread over half of the mascarpone cream.
Divide the cherries into two parts for two separate layers. Place cherries around the border of the cake, 5mm from its edge and scatter remaining in the middle.

Carefully remove layer from the board and place on top of the first layer.
Repeat each layering process on the board (you will have 1 spare slice of cake), starting with the praline mousse and ending with the cherries on the mascarpone cream.
13. Place the final layer of the cake on a wire rack sitting over a baking tray. Evenly pour the ganache over the cake, ensuring it is completely coated. When the ganache has set, place on top of the layered cake.

Decorate with shaved chocolate, fresh cherries and candied cherries.
*Since we skipped the candied cherries, we saved some of the canned ones.
P.S. You should eat this as soon as it's possible. After being on your feet for hours, you should definitely reward yourself he he he
Saturday, July 3, 2010
The macaron

YAY! SUCCESS! You know, I can not tell you HOW HAPPY I AM that my macaron shells have come out exactly how I had wanted - but dared not hope.
The first I had attempted them they came out as a total flop...and pretty much shattered me because every step had looked like I was doing the right thing. I put it down to the fact that I had attempted the Italian method the second time around, rather than the french method as I had the first time. Who knew there were so many ways to make a macaron??
All this macaron talk gets me excited. While I am a bit tired from making them now, I know I'll return to them soon. I intend on getting some food colouring (powder or paste form?) and whole lot more recipes. Please feel free to comment on your own macaron stories, advice, it's always great to share!

Thank you so much Mercotte for all the advice and steps you have provided on your "desperately-seeking-macarons" blog!
Ingredients
- 2 x 50gm of egg whites (about 4 x 600gm eggs)
- 150gm of almond meal
- 150gm of pure icing sugar (confectioner's sugar)
- 35gm caster sugar
- 150gm caster sugar (keep these separate)
- 50gm water
- OPTIONAL: Food colouring (avoid liquid as it really changes the chemistry of the batter, and maybe your down fall!)
- OPTIONAL: spices, cocoa powder etc. if you want to decorate your macarons
- RECOMMENDED: Macaron piping template. You should be able to print it and slip it under your baking paper. I tried to find one, but had no luck. Please share yours if you've managed to find one :)
***But you are not limited to the following.
Please the read the steps before you actually begin so you have an idea of what to do, and what to have on hand.
- Kitchen scales
- rubber spatula
- A sifter that is capable of sifting almond meal
- A dusting sifter (if you want to decorate your macaron shells)
- Electric mixer (hand or standing)
- Baking paper
- Piping bag & 5 cm tip. The tip is more important than the bag. I actually used a zip lock bag with the corner cut off.
Steps
- Sift the 150gm of almond meal & 150gm of icing sugar and set aside.
- Using either a hand mixer or standing mixer beat 50gm egg whites until frothy, when it does become frothy add the 35gm of sugar while beating. Do this in 3 lots.
- At the same time, have a small pot on the stove with the 50gm of water + 150gm of caster sugar until this syrup boils for about 30 seconds. (I did this because I didn't have a candy thermometer)
- Once it boils pour the syrup slowly into the mixing bowl where you are still beating the egg whites. Speed up the mixer and continue to beat until the mixture is fairly cool. It should be shiny and firm.
- Add the sifted almond & icing sugar, as well as the other 50gm of egg whites and any food colouring if you want.
- Gently fold the mixture using a rubber spatula. (this is ideal, but I forgot to bring mine over to my sister's so I was stuck with a metal spoon). Start from the middle and work your way around to the edge. Be careful not to over fold.
- Do this for a few minutes until the batter is sort of like magma. It should be pliable and when you lift your spatula, it should fall down like a ribbon.

- Time to fill your piping bag! With no tumblers on hand, I used a champagne flute to help me fill the bag... I always forget to bring stuff along with me don't I? haha
- I have no idea what parchment paper is... so I just used 1 sheet of baking paper. Taking Mercotte's advice, I dabbed a bit of the sticky macaron batter on to the corners of the baking paper to stick to my baking tray.
- Piping time! Pipe the macarons to a bit larger than a 20c coin. They should be shiny and flat, with no peaks.

- OPTIONAL STEP: You can choose to dust spices, cocoa powder etc. to decorate your shell.s I chose cocoa powder for my 2nd tray. You might notice my sifter isn't quite right for cocoa powder and it kind of just fell out in chunks. Oops! (Just another thing I forgot to take along with me to my sister's)

- Let them stand for 1 -2 hours.
- During that time, pre-heat your oven to about 150 degrees celsius. For reference, I had a fan forced oven. Maybe you should also use this time to wash up! hehe.
- When standing time is up, put the tray into the oven and leave them for about 25 minutes. Mercotte only requites 13 minutes for hers. But mine aren't quite ready until after the 25
- minute mark. You've really got to experiment with your oven, each is very different. I'm not sure why, but the ones with cocoa powder on top also took a little bit longer to form.And... voila! Prior to making a macaron, I had no idea what recipes meant by collars, little feet. Well, it's the crusty bit at the bottom of the shell :)

- If you don't intend on filling these once they've cool down, put them in an air tight container and freeze them.
- I filled mine with chocolate ganache. YUM! If I hadn't been under the watchful eye of J, I'd have licked the bowl clean ehhehe.

Notes:
- I'm not quite convinced that aging my egg whites makes that much of a difference, if any.
- I do believe the older your eggs are, the harder it is to succeed. Perhaps the trick is to get fresh eggs (right out of the chicken's... ) and age them for a few days.
- Like Mercotte I believe that you need to have quite a bit of time on your hands to make these. Don't rush it!
- I would not under any circumstance leave a bowl of the macaron batter sitting over night. I left half a bowl over night and most of my macarons just cracked the next day when I went to finish baking them. Ah the pains of a home oven.
- Some say you don't need to let your macarons stand for a while before baking. Maybe it's because I haven't mastered it yet but standing mine for 1 -2 hours lets the collars form.
Next post: the filling. Chocolate ganache! Yummm
Saturday, June 26, 2010
Bite size savoury muffins
I know there's a lot of text, and it seems daunting. But it's well worth it. (it was for me anyway)

Maybe preparing some of the ingredients the day before would help spreading your time out a little bit better, especially if you're tight on time.
Makes about 25 medium sized
Ingredients
- ½ cup extra virgin olive oil
- 1 tsp. dried thyme
- 1 tsp. dried oregano
- 3/4 cup red onion chutney OR:
- ½ clove chopped garlic
- 1 small brown onion diced
- 1 tbsp raspberry red wine vinegar
- 1 ½ tsp. brown sugar
- 2 tsp. sun dried tomato vinaigrette If you can’t find, or don’t have this –don’t worry. You can finely chop 2-3 sundried tomatoes, or just go without

(I got my sundried tomato vinaigrette from Peter's of Kensington)
- 1 ½ cups diced deli ham
- 1 chopped chilli with seeds (I like a bit of kick, you don't have to add any chili if you prefer not to :)
- 1 tbsp. extra virgin olive oil
- 1 cup roughly chopped & washed rocket (let it dry)
- 250gm Danish fetta cheese; either crumble or diced into small pieces
- ½ cup grated parmesan cheese
- ¼ cup grated cheddar cheese
- 1 cup of store bought shredded mozzarella cheese
- 2 cups self rising flour
- Pinch salt
- ¼ cup caster sugar
- 1 cup skim milk
- 2 medium sized eggs
Also, you could skip the herbs and olive oil if you've got some marinated fetta on hand.
STEPS
1: Seasoned olive oil
Combine the following ingredients and mix. Let it sit for ~10 minutes while you prepare everything else
- ½ cup extra virgin olive oil
- 1 tsp. dried thyme
- 1 tsp. dried oregano

2: Marinated onions
Mix these ingredients together, let it sit for at least ~10-15 minutes (if you can let this sit over night it would be even better)
Alternatively, if you have red onion chutney on hand, you do not need to prepare the marinated onions
- ½ clove chopped garlic
- 1 small brown onion diced It would be preferable if you used red onions.
- 1 tbsp raspberry red wine vinegar
- 1 ½ tsp. brown sugar
- 2 tsp. sun dried tomato vinaigrette If you can’t find, or don’t have this –don’t worry. You can finely chop 2-3 sundried tomatoes, or just go without

In a medium pan on high heat, add the marinated onions and let them begin cooking for a few minutes –then add the ham, chopped chilli & tbsp. of extra virgin olive oil (See below under Ham)
Stir occasionally so that nothing sticks to the bottom. Cook until softened. Let them cool down.
3: Ham
- 1 ½ cups diced deli ham
- 1 chopped chilli with seeds (I like a bit of kick, you don't have to add any chili if you prefer not to :)
- 1 tbsp. extra virgin olive oil

4:While the onions and ham are cooking, prepare the following:
- 1 cup roughly chopped & washed rocket (let it dry)
- 250gm Danish fetta cheese; either crumble or diced into small pieces
- ½ cup grated parmesan cheese
- ¼ cup grated cheddar cheese
- 1 cup of store bought shredded mozzarella cheese
5: Dry ingredients
In a large mixing bowl sift in the flour. Add the salt & sugar
- 2 cups self rising flour
- Pinch salt
- ¼ cup caster sugar
6: Wet ingredients
In another mixing bowl, add the milk, eggs & seasoned olive oil (from first step). Whisk until well combined
- 1 cup skim milk
- 2 medium sized eggs

When well combined, pour the wet ingredients into the mixing bowl with dry ingredients. Mix together until smooth –do not over mix.

Add the rocket, Danish fetta, parmesan cheese, cheddar cheese, marinated onions + ham.

Mix until all ingredients are well combined.

Spoon mixture into well greased muffin tins. Sprinkle with mozzarella cheese. I had used cup cake cups but I found that due to the cheese, the muffins were INCREDIBLY STUCK to the paper. In hindsight, I advise to use well greased cupcake/muffin trays as opposed to cupcake paper cups =P

Bake for 25 minutes on 165 degrees celsius. (I used a non fan forced oven for this).

Let them cool. And then eat!!! :)
x
Wednesday, June 23, 2010
cupcake decorations... faux fondant?

So here's the recipe. The measurements are vague since I tend not to do proper measurements when making icing (sorry!) but I'll try my best to guide you through what to do :)
Ingredients:
- 1/3 cup of Icing mixture (Sifted if it is not from a new packet)
- 2-3 tsp. of slightly melted room temp. butter
- food colouring (preferably powder or liquid)
- small cookie cutters
- fondant cutters
- baking paper (don't worry -no baking required!)
- rolling pin (optional)
What to do:
- In a small bowl combine the ingredients with only the slightest amount of food colouring (remember food colouring is quite potent)
- place the bowl in either a larger bowl, or a sink of hot water. Make sure that there is enough hot water to come about half way up the outside of the bowl with the ingredients
- Leave for a minute to allow the butter to melt
- Mix the ingredients until well combined. If it is gooey, add more icing mixture. If it won't combine into something, add more butter
- Add more colour if you want
- Repeat step 4 until you are able to grab the icing in the bowl and mould it like play dough (It shouldn't be sticky, if it is, more icing mixture!!)

- On a sufficient sheet of baking paper flatten the mixture out with your palm (about 3-5mm), and roll out so it is smooth with a rolling pin. I skipped the rolling pin step because my mother hid it some where.. haha (it's okay to do it in small lots)

- Like the same way you would with cookies use the cutters to cut out your shape -IF they shapes tend to be really soft and break when you move them, just leave them where they are as the shapes will dry out as time passes.

- Fridge for 30 minutes before using.

Here are other ones I made earlier.


x
Monday, May 31, 2010
Easy Peasy Butter Cookies Recipe

I find that these cookies are generally a crowd pleaser, and very easy to make. A beginner should be able to make these without much trouble -or utensils :)
This recipe makes ~16 cookies
Before you begin: Please read through the entire recipe + ingredients + TIPS to make sure you have everything you need, and so that you have some idea of what to do next.
I have also noted that you'll need things such a hand electric mixer, rolling pin, dusting board, cookie cutters. If you are missing any of these things... don't worry! It is preferable to have all these utensils on hand but the cookies will still turn out fine if you don't.
good luck x
P.S. I'm really sorry if these instructions are hard to follow, lengthy. I tried to make them as simple as detailed possible for beginners...but this is the first time I've ever had to write it down for anyone.
Things you need to begin with
- Measuring cups
- rolling pin
- cookie cutters (5 -6cm in diameter)
- sifter
- 2 small bowls
- 1 large mixing bowl
- flouring board (A large chopping board, or a clean flat surface is sufficient :)
- baking tray & baking paper
- * electric hand mixer
- 1 1/2 cups of plain flour
- 2 egg yolks
- half a block of butter ~125 g, Softened not melted
- pinch of salt
- 1 teaspoon of vanilla essence
- 1/2 cup of caster sugar
- * optional: choc chips & roughly chopped nuts. I prefer white choc chips for this recipe :)
There's no limit as to what you can do to decorate these cookies. They're beautiful whether they are decorated, or not. Since I've done this recipe many times over, I've also included photos of other ways for decorating these cookies.
However, I'll run through the basic icing recipe.
You will need (these are rough, adjust if you need to)
- 1/2 cup of icing sugar *
- 1 teaspoon of butter
- 1 -2 tablespoons of milk
- food colouring (I prefer using gel colouring)
TIPS:
- To make these thick, and soft -sort of like short bread cookies, roll the dough out to 1.2cm
- Remember: cookies dough is not bread dough. There's absolutely NO NEED to start kneading the dough as if it was. If you overwork the dough, it becomes dense, and the cookies become tough.
- If the amount of butter is a bit frightening to you -it seems to work if you replace half the amount of butter with olive spread. I use Olive Grove, but I'm sure other brands would work fine. You'll find it in the refrigerator section in the supermarket somewhere near the butter & margarine. Don't mistaken this olive spread for something you'd have with cheese & crackers hehe.
STEPS
(follow this if you have all the stated utensils -read the next set of steps below if you don't)
- line the baking tray with baking paper
- The 2 small bowls: Start by separating the egg yolks from the egg whites. You don't need the egg whites for this recipe. If you don't know how, or still trying to perfect the separating process you can read this entry to see how.
- In the large mixing bowl, cream the butter + caster sugar + egg yolks
- Once you have creamed the butter, egg & sugar, add the vanilla essence and salt
- Begin sifting in the plain flour and continue mixing with the electric mixer until a dough mixture forms. This step shouldn't take long.
- Add in the nuts & choc chips if you have chosen to include them.
- Pre-heat your oven to 165 degrees celcius
- Lightly dust your flouring board
- Using your hands, grab some dough and form it in to a ball. The ball should be about a tennis ball size -but it really depends on how much room you have on your flouring board to work with.
If the ball is a bit dry, hold it in your hands for a few seconds. It should warm up the dough, if it doesn't, melt a little bit of butter and add it to the mixing bowl and combine with your hands. - roll out the dough to about 1.2cm in thickness and begin cutting out your cookies. At this point, a spatula may be useful when transferring your cookies to the baking tray.
- Bake for 10-15 minutes. I usually use a conventional oven for these cookies and 15 minutes works well for me. 10 minutes is enough for a fan forced oven
- Let them cool before you begin icing them
Follow steps 1&2, 7-12 as above
For steps 3-6
- Using the large mixing bowl, sift in the plain flour
- Add the caster sugar, egg yolks, butter, vanilla essence, salt (AND the choc chips & nuts if you want them in your cookies)
- With a wooden spoon gently combine the mixture until it sort of looks like a bowl with bits of lots and lots dough in it
- Use your hand to combine the dough more, so that will be ready to roll out.
(this is for when you are making bread...and you are not :))
- go on to step 7
How to know when the cookies are ready
- When you stick a fork or skewer through the cookies, it should come clean
- If you gently lift the cookies up the base should be at most a little darker than golden brown
- The cookies may seem too soft when you take them out...and they might be haha. But these cookies do harden a bit when they rest -so it is really up to you & how hard or soft you like your cookies.
If you've run out of icing sugar, you can use white sugar, or caster sugar. To make an ample amount of icing sugar, you can simply put 1 cup of sugar into a blender and blitz it until it becomes fine and powdery, just like icing sugar!
- In a small bowl, combine the icing sugar, milk and softened butter.
- Microwave for 10-20 seconds. Mix the icing sugar, milk & butter. You should get a gooey consistency. If it's too runny, add more icing sugar and mix.
- Add a bit of food colouring if you like
- spread a fair amount of icing on a cookie. You can add sprinkles if you like :)
